Change SQL Port
If you are unable to connect a computer to the SERRAM Server, first follow these
instructions to rule out other possible causes.
If you are sure you tried everything else and you did follow all the instructions provided, then the problem is probably that the default port number (1433) used by SQL Server is not available on the Server computer.
To change the SQL Server port number follow these instructions step by step. We will change the default port number from 1433 to 11433 (we just add a 1 in front).
Follow these steps on the ROBOILL Server
Go to 'All Apps' > 'Microsoft SQL Server 2014' and open 'SQL Server Configuration Manager'.
If you can't find it, right click on the Windows start button and select 'Run'
In the Run box type: SQLServerManager12.msc
and press ENTER.
In the left pane, select 'Protocols for SERRAM' under 'SQL Server Network Configuration'.
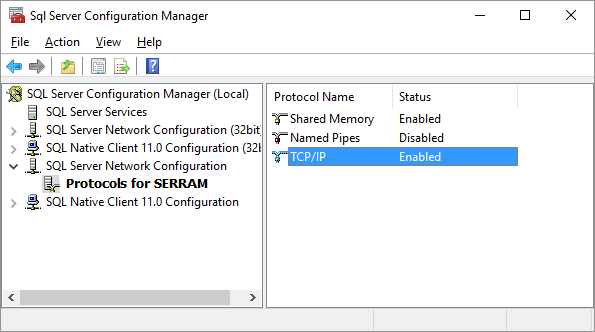
TCP/IP should be enabled. If not, it means that the wizard did not install SQL Server.
Right click on TCP/IP, select Properties and go to the 'IP Addresses' tab.
Go down the list and change ALL the ports to 11433. Remove anything that is in the Dynamic ports.
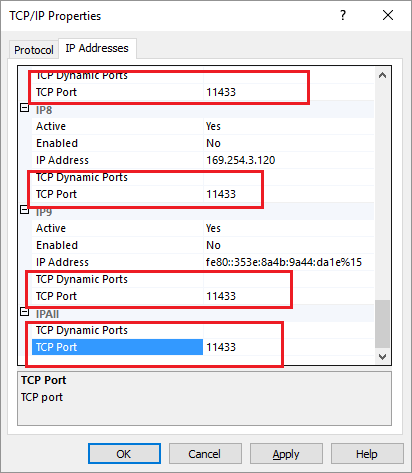
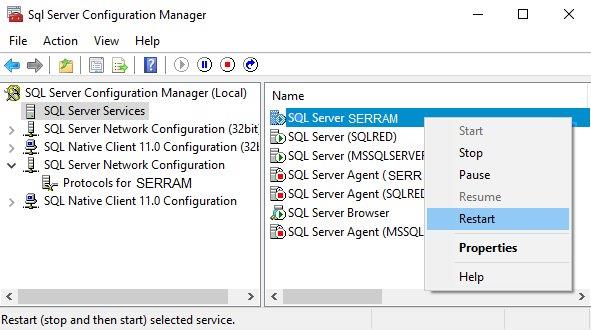
Save your changes. Click on 'SQL Server Services' in the left pane. Right click on SERRAM and select 'Restart'.
 Windows Firewall
Open Windows Firewall from your Control Panel. Go to Inbound Rules and change the 'SQL Port' port number from 1433 to 11433.
If you can't find it, add a new Inbound Rule
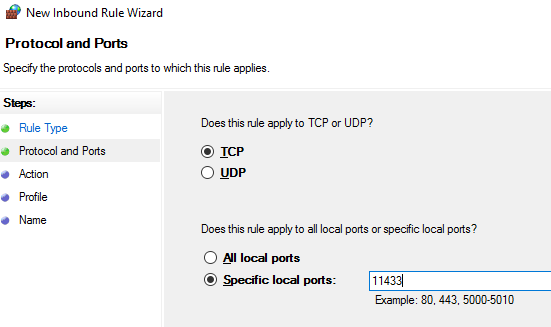
Select 'Allow Connection' and for a name use 'SQL Port'.
Follow these steps on the computer you are trying to connect
Start the SERRAM Database Setup Wizard directly (All Apps > SERRAM).
Select 'Additional Install' and enter your ROBOTIL Server name (the computer where you just changed the port number).
On the next screen, select 'The Wizard did not install SQL Server' (even if it did).
At the end of the server name, after '\SERRAM' enter: ,11433
Don't forget the comma before the 11433. See below:
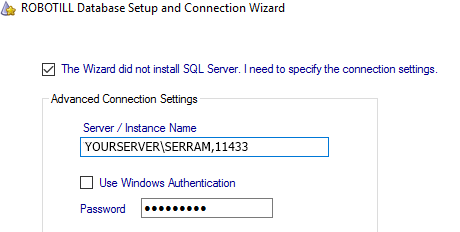
Do not change any other settings. Complete the setup. It should now work.