Print Design and Layout
All the printed slips are completely customizable and easy to set up with the unique SERRAM drag and drop design tool. The slips can be any size, it can be for a POS printer but also any standard printer printing on A4, A5 or any other paper. The pages can be designed for any size.
Slips that are specific to the retail module will be under the retail menu item, and slips that are specific to the restaurant module will be under the restaurant menu item.
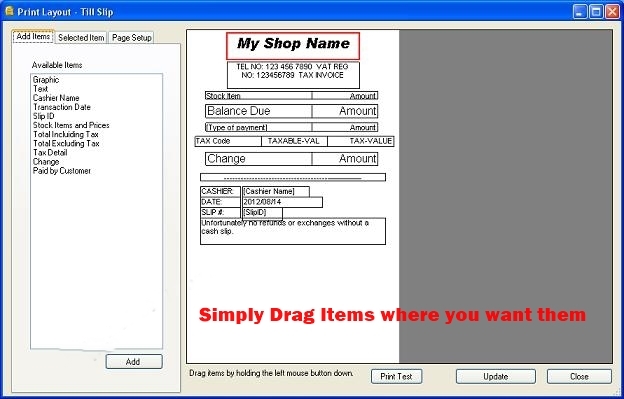
To customize the print layout of any of the items above, in Manager, select Setup from the Menu, Print Layout and then the form you want to change.
For this example we will explain how the Till Slip setup works but the rest of the forms are done in the same manner.

Each form will have available items that you can choose from. To add an item, simply select it in the left panel and click on Add. It will be dropped in the top left corner.
You can then drag the item to the desired location by using the left mouse button (holding it down while dragging).
You can select any item by just clicking on it with the left mouse button (one click).
When an item is selected, the properties for that item are displayed on the left.
You can change any of the properties like item width, height etc. and the click on Apply to set the new properties.
Some items will have more than one column. You can set the alignment and width of each column separately.
Some items will automatically ‘grow’ as needed like Stock Items depending on the number of items in the slip. It is not needed to leave space for this as all the items below will automatically be moved down.
If there is an item that you don’t want to move down the page (if you add a comment at the bottom of a fixed page for instance), you can check the ‘Y Position is fixed’ check box. You only need to do this for items that are placed below any other items that will ‘grow’ in height and that you don’t want to move down.
With some items you can change the text (Text Items, Change, Totals). To change the text, select the item and type the new text in the properties window. Click on Apply to apply the new text.
You can add as many graphics as you need. Select the graphic in the left panel and click on Add Item. You can select a graphic from ones that you added already or you can click on ‘New Image’ to add a new one. You then just browse for the graphic and give it a name. The name will not be printed and is just used during the design of the print setup.
To print on top of a graphic, set the graphic as a background item in the item properties.
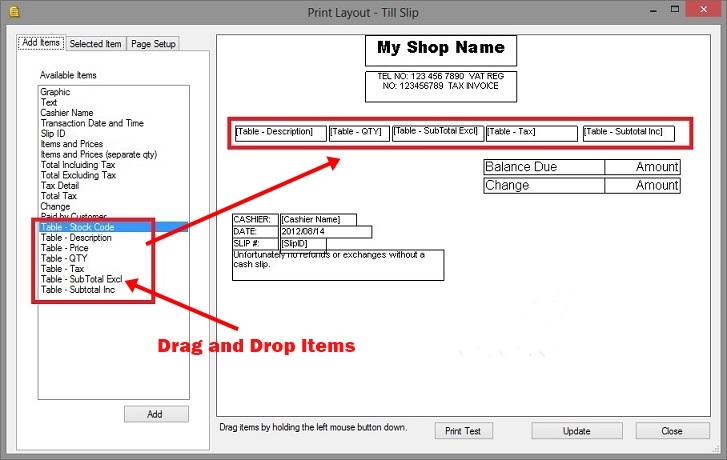
Table Items
Table Items in the Print Design form are items that are similar to the slip detail item, where you place one item on the page and when the slip is printed all the items will be printed and everything else on the page (that is not set as fixed height) will move down.
The difference with table items is that you can put them in any order and you can choose the items that you want to add to your 'table'. With the table items you can also specify the height that each row must move down (with the slip detail items, the height is automatically calculated and you cannot change the height).

Table items are ideal if you are printing on pre-printed stationary.