Restaurant - Quick Start Guide
To get started with the Restaurant Module follow the instructions below.
Step 1: Set up your POS Screen
The Restaurant module (also used for Bars and Fast Food stores), uses Categories to group Stock Items together. So you first need to add one or two categories.
Open SERRAM Manager and log in. If you haven't changed your password yet, the username is 'admin' and the password is 'password'.
Click on 'Main Setup' and then 'Stock and Menu Categories'. Click on 'Add Category' and add a category called 'Breakfast Menu'.

You can add more categories if you want. You can also open the Default Category and check the box 'Do not include this category as a menu item in the Restaurant Module' to prevent it from showing up in the POS screen.
Step 2: Add a waiter or choose not to use waiters
If you don't want to use waiters do the following:
In Manager, click on 'Restaurant | Bar' in the Menu and then 'Restaurant | Bar Configuration'.
Select 'Don't allocate waiters to tables' in the 'Do you want to use waiters' section.

Click on Update.
If you do want to use waiters, do the following:
In Manager, Select 'Main Setup' and then 'Users'. Click on 'Add User' and add the waiter name. Choose a password for the waiter.
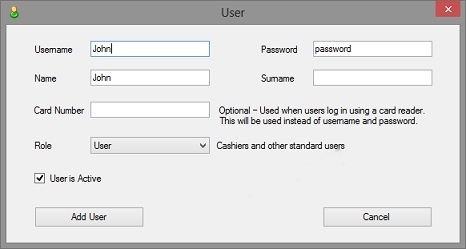
Click on 'Add User'.
Step 3: Add something to sell
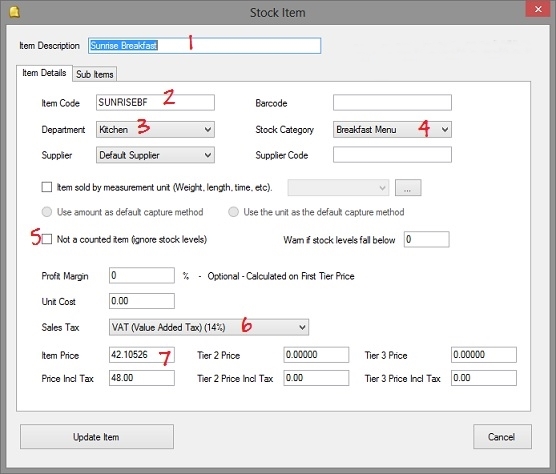
In Manager, click on 'Stock and Menu' and then 'Stock and Menu Items'. Click on 'Add Stock Item'.
- Enter 'Sunrise Breakfast' (or anything you want) for the description.
- Enter 'SUNRISE' for the item code.
- Select the 'Breakfast Menu' Category (or the correct category).
- Enter a price including tax
- Click on 'Add Item'.
That's it! You are now ready for your first sale.
Step 4: Do your first sale
You can leave Manager open or close it. It does not need to be open when you are doing sales.
Open SERRAM Restaurant and log in. Do not log in as the waiter that you created. Log in as 'admin' or the cashier if you created another user for the cashier.
In the Restaurant module, all sales are linked to a specific table. (if you have a fast food store you can still use tables and just rename them to orders. That will be useful if you have telephone orders that you need to keep open).
Click on 'Select Table'. At this stage, there will only be one table, select it.
If you chose to use waiters and created 'John' the waiter, he will appear in the list of users. Select the waiter 'John'.
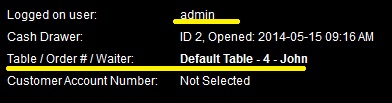
You will notice that on top of the POS screen it will show you that the logged in user (cashier) is 'admin' and that the current selected table is 'Default Table' and that the waiter for that table is 'John'.
To add items to the sale, select the category 'Breakfast Menu' and click on 'Sunrise Breakfast' (on a touch screen you will just touch instead of click).
To add another one, just click the 'Sunrise Breakfast' button again or use the UP ARROW key.
There are a couple of things you could do now:
- If there where more than one table, you could change to that table and later come back to this table (sale) to add more items or complete it.
- You can print an intermediate bill.
- You can print an order slip that will be printed on the kitchen printer (need the full version and the department printer needs to be set up).
- You can add a tip.
- You could also add a note to the item like 'eggs must be soft' (also need the full version for this).
... but for now, we will just complete the sale:
Click on the 'Pay' button or press F5.
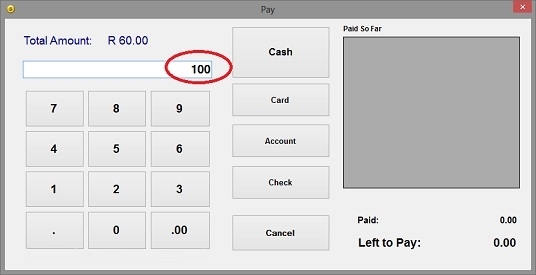
Enter an amount equal or greater than the required amount and press ENTER. If your electronic drawer was set up, it will now open.
The change will be displayed in the main POS screen (top right).